Good morning! (Or afternoon, or evening, depending on where in the world you are!) Today I'm going to talk about hand quilting - my way. I'm self taught, so I may do this a little differently than the norm..I'm not sure. I hope my insight can help some of you readers try this for the first time. Many of you have expressed the desire to learn how to hand-quilt.
Above is a pic of a little sunflower I hand-quilted on my Wine and Cheese quilt. I enjoy hand-quilting on some of my quilts because it is relaxing and also good thing to work on while watching TV with the kids.
Let's talk about supplies for hand quilting. It will be a lot more fun to do if you start with the right notions. First, you have to have a thimble that is comfortable to you. I started out using an all leather thimble, but after a few injuries (the needle piercing the leather) I decided that was not for me. Then I tried a thimble with a ridged top and leather sides. That became my favorite. Occasionally the sides fall apart, but I found these can easily be repaired with some tacky glue. Currently, I am using the above thimble. It was a gift, so I tried it out. I really like the ridged top, but the all metal sides sometimes make my finger sore. You have to experiment - find what works best for you.
I find that I really prefer using thread that is specifically made for hand quilting. It will be marked "hand quilting" on the spool itself. You can find hand quilting thread at almost any fabric shop, quilt shop, or even your local Wal-Mart. I have also been known to use Y.L.I. 100 percent cotton machine quilting thread. I really like the texture of this thread. It works well for hand-quilting, too, just run it through a little beeswax to keep from tangling.
Having a needle that works for you is so important to successful hand-quilting, too. Again, you have to experiment to find what works best for you. Generally, the smaller the needle, the smaller your quilting stitches will be. I am currently using Dritz Quilter's Betweens, Size 8. I think I purchased these at Jo-Ann's.
Above is my version of my South Shore Road Quilt. This design appeared in Quiltmaker Magazine in 2006 as a series quilt. I sewed the top, sandwiched it together, admired it, and put it away to quilt another day! U.F.O. guilty!
I have been working on it recently and have almost all of the house and tree blocks quilted. I am simply doing some echo quilting on the tree blocks, and in the ditch quilting on the houses. I'm going to demonstrate on the above house today. It's a little red house, with a precariously balanced chimney - oooops!
Some people like to quilt with a hoop, some don't. I like it. I think it goes back to my crazy cross-stitching days. This is my favorite hoop. It's made of a sturdy, plastic material. I put the quilt section that I am going to be working on in the hoop as taught as possible without warping the block. Make sure the back of your quilt is smooth within the hoop - no puckers!
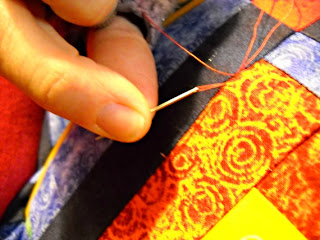
Then I make a simple knot at the end of my thread, like this:
I wrap the thread around my index finger.
I roll it off my finger, using my thumb.
Pull the tangled thread to the end, between my index finger and my thumbnail.
Voila!
To bury the knot, I insert the needle about an inch away from where I want to begin quilting, slide it through the batting layer of the quilt, and bring the needle up where my first stitch will start.
Pull the thread through so the knot is sitting on top of your quilt.
Then, give a little tug to bury the knot inside the layers of your quilt. At this point, no thread should be showing on the back of the quilt.
To make the first stitch, I reinsert the needle "a stitch away", and using my thimble, push only the tip of the needle through all the layers of the quilt. My other hand is underneath, and I am feeling for the tip of the needle with the index finger of that hand.
When I feel the tip of the needle, I rock it on the top of the quilt with my thimble, while also using my underneath finger to guide the needle back to the top of the quilt.
Here it is!
Pull the thread tight and you have made one stitch! You can make multiple stitches at one time by simply rocking the needle back and forth through all layers of the quilt to pick up more stitches on your needle before pulling the thread through. I usually do 3 or so myself. If I load more onto my needle I find it tough to pull through. Doing multiple stitches will also help to keep your quilting line straight and even.
I tried to take a pic of the back of my quilt so you can see what my underneath hand is doing. You can kind of see it - kind of.
Here's how my house looks after in the ditch quilting. The chimney is still falling off! Look out below!
Here's a vine I hand-quilted onto the borders of another quilt. I used templates to mark the quilting beforehand.
I hope this encourages you to take up your needle and try some hand-quilting!
Until next time...please visit the Curlicue Creations Shop...and have a super day!
Get Creative!
Jennifer Schifano Thomas


No comments:
Post a Comment