Wednesday, April 30, 2014

Mountain Pass Quilt

 The Mountain Pass quilt is my most recently published work.  You can find it in the Summer 2014 issue of Quilter's World magazine.  They did an excellent job of presenting this quilt in their magazine.  Look at the awesome photo, above!  I wish I could take a picture like that!  


You can get the magazine at your local shops, or purchase a digital issue at the Quilter's World website.  They even have a little video tutorial showing how to sew the curved piecing for this quilt here:  Quilter's World Magazine


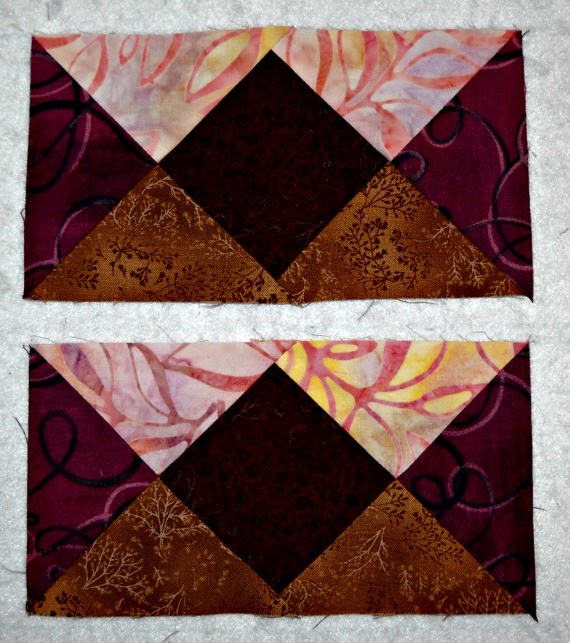
This quilt is a great stash buster - which is exactly what I did.  Here are some of the fabrics I used, pulled straight out of my stash.  With this quilt, the scrappier, the better.


I sewed lots and lots of little pink rainbows!  And little blue rainbows!  And little green rainbows!


I kept a little basket on my sewing desk to help keep things organized as I worked.


I also kept each stack of fabric strips in it's own little baggie with a slip of paper, labeling the strips.  
This was a challenging quilt for me, but it came together beautifully and I'm so glad I made it.


You may wonder what happens to my quilts when they arrive back home from the magazine.  I am enjoying this one on my bed for a little while.  Kit Kat and William immediately put their mark of approval on it.
I try hard to keep all cat hair off my quilts pre-publication, but afterwards....


Kit Kat:  "Oh yes!  I love this quilt!  Let me roll all over it and mark it with my silky black fur!"


William:  "You look so silly.  A respectable cat would never do that on camera."


Kit Kat:  "Relax. I'm tired from all that action.  Time to take a nap."


William:  "Okay.  Just stay on your side.  I've got to wash up for my photo-op."

Just a quick reminder....please join me tomorrow for the next installment in the Star Block of the Month tutorial series.


And Friday will be my segment of the Quiltmaker's 100 Blocks Volume 9 Blog Tour.  There will be giveaways!

Until next time...please visit the Curlicue Creations Shop...and have a super day!

Get Creative!

Jennifer Schifano Thomas


Monday, April 14, 2014

1980's Fashion Flashback!

This week I've added a couple of 1980's classic sewing patterns to the shop.  Fun, and still fashionable!  Isn't it about time for shoulder pads to come back into style?


Adorn your self in this pleasantly stylish outfit with this easy McCall's wardrobe pattern. The cocoon style jacket is unlined and has shoulder pads. The tank top is a pullover style. The tapered pants are also an easy pull-on style with a partial elastic waistband and side seam pockets.


Adorn your self in a variety of cute and stylish dresses with this easy to sew Simplicity dress pattern. The dress can be sewn in three lengths, with a straight or flared skirt. All dresses feature back zipper closure and side seam pockets. Other options include with or without collar, long sleeves, or sleeveless, and front pleats. This pattern is also petite-able.

Until next time...please visit the Curlicue Creations Shop...and have a super day!

Get Creative!

Jennifer Schifano Thomas

Saturday, April 5, 2014

Fresh Out of White Thread


I got stuck on the Stitch-A-Long this week.  You can see the next block, the Friendship Star block is almost complete.  I ran out of White DMC to fill in the background.  I have floss stashed everywhere, too.  I have six of those handy-dandy floss keeping boxes, a jar of floss, a wooden box full of floss, and one bent up tin of floss.  No White anywhere!  I guess I'll have to go shop soon.

Until next time...please visit the Curlicue Creations Shop...and have a super day!

Get Creative!

Jennifer Schifano Thomas

Tuesday, April 1, 2014

Star Quilt Block of the Month Tutorial #9 - Royal Star

Welcome to Block Nine, Royal Star.  This block looks complex, but if you follow my step by step instructions, you will find it is easy to sew.  The most important thing to remember while sewing this block, is to double check that each unit is facing the correct direction before stitching your seam.   If you need to catch up, the previous eight Block of the Month Tutorials can be found under the "Star Block of the Month Tutorials" tab at the top of this page.  Remember that all seam allowances are 1/4".  All blocks in this series will finish at 12".  And away we go....


The Royal Star Block appears as a star floating over a background of four triangles.  Keep this in mind when you pick out your fabrics. You will need a good contrast between the lights for the background, and the darks for the star to get pleasing results.


The fabrics I used in my block from left to right:  Pink, Lilac, Purple, Brown, Dark Brown.  These fabrics are all from Robert Kaufman.  The pink is an Artisan Batik, the lilac and purple are from the Jennifer Sampou Studio Stash line, and the browns are Fusions.


Cutting Instructions

                            Pink:  Cut 2 ea. 3-7/8" squares A          Lilac:  Cut 2 ea. 3-7/8" squares A   
                                     Cut 1 ea. 4-1/4" square B                      Cut 1 ea. 4-1/4" square B
                                     Cut 2 ea 2-5/8" squares C                     Cut 2 ea. 2-5/8" squares C

Purple:  Cut 4 ea. half square triangles D from 2 ea. 3-7/8" squares  
Cut 2 ea. 4-1/4" squares B

Brown:  Cut 8 ea. quarter square triangles E from 2 ea. 4-1/4" squares

Dark Brown: Cut 4 ea. 2-5/8" squares C 


Sewing the Block:

Step 1:  Sew each of the Pink 2-5/8" squares C to a Lilac 2-5/8" square C.  


Sew the pairs together to make a Four Patch unit.


Sew one Purple half square triangle D to each side of the Four Patch unit.


For accuracy, match the point of the triangle with the center line of the four patch unit and pin.


The completed center unit.


Step 2:  Sew one Brown quarter square triangle E to one side of a Dark Brown 2-5/8" square C.


Sew a second Brown quarter square triangle E to an adjacent side of the Dark Brown 2-5/8" square C to make a large triangle unit.


Sew a total of four large triangle units.


Draw a diagonal line from corner to corner on the reverse side of the Pink 4-1/4" squares B and the Lilac 4-1/4" squares B.


Pair them right sides together with the Purple 4-1/4" squares B.


Sew 1/4" away from the line on both sides.


Cut on the drawn lines.


Open out, and press.


Cut each unit in half diagonally from corner to corner to yield four Pink/Purple small triangle units and four Lilac/Purple small triangle units.

Sew two of the Pink/Purple small triangle units to one of the large triangle units.


Repeat.


Sew two of the Lilac/Purple small triangle units to one of the large triangle units.  Repeat.


Step 3:  Draw a diagonal line from corner to corner on the reverse side of the Pink 3-7/8" squares A.


Pair them right sides together with the two Lilac 3-7/8" squares A.  Sew 1/4" away from the line on both sides.


Cut on the drawn lines.


Open out, and press.  You should have four each Pink/Lilac square units.  Each unit should measure 3-1/2" square.


Step 4:  Lay out the block.  Be careful with the unit placement.  When the units are in the correct positions, it should appear as if the star is "floating" over a background of two Lilac triangles, and two Pink triangles.


Sew the units into three rows.


Sew the rows together to complete the block.

Smile!

Until next time...please visit the Curlicue Creations Shop...and have a super day!

Get Creative!

Jennifer Schifano Thomas