
This month's block is Flying Star. This block was inspired by Debbie Powell of Miss Lou's Quilting Studio. She was the spark of inspiration for this design. I played with it and played with it and this is the end result.

Flying Star
Remember that all blocks are 12" finished, and all seams are 1/4". If you need to play "catch-up" the other four blocks are posted at the top of my blog, under the Star Block of the Month tab.

I used three fabrics for this block, Purple, Lilac, and Light Pink.

Cutting Instructions:
Purple: Cut 8 ea. 1-1/2" squares A Lilac: Cut 4 ea. 1-1/2" squares A
Cut 20 ea. 1-7/8" squares B Cut 8 ea. 1-7/8" squares B
Cut 2 ea. 5-1/4" squares C Cut 2 ea. 5-1/4" squares C
Cut 5 ea. 2-1/2" squares D Cut 4 ea. 1-1/2" x 2-1/2" strips E
Light Pink: Cut 8 ea. 1-1/2" squares A
Cut 12 ea. 1-7/8" squares B
Sewing the Flying Star Block:

Step 1: Draw a diagonal line from corner to corner on the reverse side of all the Light Pink 1-1/2" squares A.

Lay one Light Pink 1-1/2" square A on one Lilac 1-1/2" x 2-1/2" strip E, right sides together with top, bottom, and right edges lined up. The drawn line should run from the top left center to the lower right corner of the unit.
Sew on the drawn line, from edge to edge.

Flip the Light Pink fabric open, press, and trim away the two layers of backing fabric, leaving an approximate 1/4" seam allowance.

Your unit should look like this.

Lay a second Light Pink 1-1/2" square A face down on the unit with top, bottom and left edges lined up. The drawn line should run from the top right center to the lower left corner of the unit. Sew on the drawn line, from edge to edge.

Flip, press, and trim as before.

The unit should measure 1-1/2" x 2-1/2".

Repeat to sew a total of four flying geese units.

Using the four flying geese units, the four Lilac 1-1/2" squares A, and one of the Purple 2-1/2" squares D, lay out the center square of the block. Be careful to orient the flying geese units so they are pointing outwards.

Sew into three rows.

Sew the rows together to form the center square unit. This unit should measure 4-1/2" square.

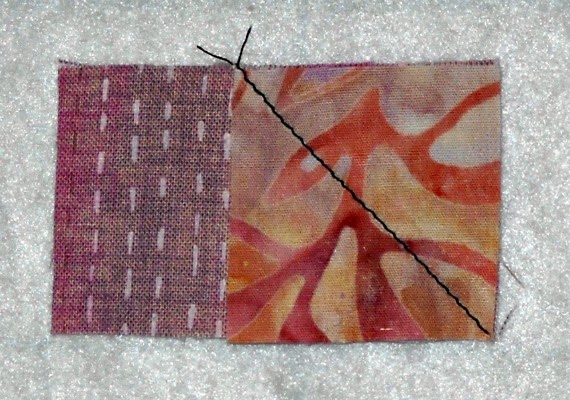
Step 2: Draw a diagonal line from corner to corner on the reverse side of all the Purple 5-1/4" squares C.

Pair them right sides together with the Lilac 5-1/4" squares C. Sew 1/4" away from the drawn line on both sides.

Cut on the drawn lines.

Open out, and press.

With right sides together, and opposite colors matching (Purple on Lilac, Lilac on Purple)...

again draw a diagonal line from corner to corner.

Sew 1/4" away from the line on both sides.

Cut on the line.
\

Open out, and press.

Make four each, 4-1/2" hourglass units.

Step 3: Draw a diagonal line from corner to corner on the reverse side of all the Purple 1-7/8" squares B.

Pair them right sides together with the eight Lilac 1-7/8" squares B and the twelve Light Pink 1-7/8" squares B. Sew 1/4" away from the drawn line on both sides.

Cut on the drawn lines.

Open out, and press.

You should have 16 each Lilac/Purple half-square triangle units and 24 each Light Pink/Purple half-square triangle units. Each unit should measure 1-1/2" square.

Sew the Lilac/Purple units into pairs to make eight sets. Note the directions of the triangles. Four sets should point right and four should point left.

'Sew one Purple 1-1/2" square to the end of four of the sets as shown above. Be careful with the triangle direction!

Add one Light Pink/Purple half-square triangle unit to the other end of these four sets.

Next, sew the Light Pink/Purple units into pairs to make eight sets. Again, watch the triangle directions. Four of the sets should point to the right, four to the left.

Sew one Purple 1-1/2" square and one additional Light Pink/Purple unit to four of the sets as shown above.
Be careful with the triangle direction!

Lay out one of each set and one each Purple 2-1/2" square D to form a corner square.

Sew the Lilac/Purple units to the left side of the Purple 2-1/2" square D.

Sew the Light Pink/Purple units to the right side of the Purple 2-1/2" square D.

Sew the top and bottom units in place for form a corner square.

Make four corner squares. Each corner square should measure 4-1/2" square.

Step 4: Lay out the entire block. Be sure the Purple sides of the hourglass units are on the edges of the block. Also be sure the Lilac points of the Corner Square units are in the block corners.

Sew the units into three rows.

Sew the rows together to complete the block.
Smile!

Here's an example of what it would look like if you put nine of these blocks together in a straight setting. Note the interesting secondary pattern that appears.
Until next time...please visit the Curlicue Creations Shop...and have a super day!
Get Creative!
Jennifer Schifano Thomas
Very thorough tutorial. I have this bookmarked. Many thanks!
ReplyDelete